 |
| http://www.diyncrafts.com/10706/decor/40-fun-and-creative-easter-crafts-for-kids-and-toddlers |
Mar 9, 2015
Easter Crafts for kids
Mar 7, 2015
How to Make Lilac Perfume at Home
How to Make Lilac Perfume at Home

Make Lilac Perfume at Home
Lilacs are a beautiful addition to the garden, producing an abundance of early-spring to mid-summer flowers ranging in color from white to pink to many shades of purple. But whatever the color, lilacs are known for providing a lovely scent that's popular in perfumes. If you enjoy the light, spring-like fragrance of lilacs, you can create your own lilac perfume right at home for a fraction of the cost that you'd pay for a designer scent. With a few ingredients and a simple recipe, you'll be creating lilac perfume straight out of your garden in no time.
Things You'll Need:
- Lilacs
- Bowl
- Plate
- Distilled water
- Cheesecloth
- String
- Pot
- Glycerin
- Step 1Harvest a large bunch of lilacs flowers and remove the stems and leaves.
- Step 2Line a large bowl with a piece of cheesecloth. Make sure the cheesecloth is big enough so that the edges drape over the sides of the bowl. Place the lilacs on top of the cheesecloth in the bowl and pour 2 cups of distilled water over the lilacs. Make sure the lilacs are completely submerged in the water.
- Step 3Cover the bowl with a plate and let sit overnight.
- Step 4Gather the edges of the cheesecloth and bring them together, twisting the cheesecloth into a sachet with the lilacs in the middle. Secure the sachet with a piece of string.
- Step 5Pour the lilac water into a pot and bring to a simmer. Place the sachet in the simmering water and allow it to cook for about an hour, or until it is reduced by half. Allow the perfume to cool completely.
- Step 6Pour the perfume into a decorative bottle.
- Step 7Add 4 drops of glycerin. Secure the lid and shake to combine.
How to Make Lilac Perfume at Home
How to Make Lilac Perfume at Home
Make Lilac Perfume at Home
Lilacs
are a beautiful addition to the garden, producing an abundance of
early-spring to mid-summer flowers ranging in color from white to pink
to many shades of purple. But whatever
the color, lilacs are known for providing a lovely scent that's
popular in perfumes. If you enjoy the light, spring-like fragrance of
lilacs, you can create your own lilac perfume right at home for a
fraction of the cost that you'd pay for a designer scent. With a few
ingredients and a simple recipe, you'll be creating lilac perfume
straight out of your garden in no time.
Things You'll Need:
- Lilacs
- Bowl
- Plate
- Distilled water
- Cheesecloth
- String
- Pot
- Glycerin
-
Step 1Harvest a large bunch of lilacs flowers and remove the stems and leaves.
-
Step 2Line a large bowl with a piece of cheesecloth. Make sure the cheesecloth is big enough so that the edges drape over the sides of the bowl. Place the lilacs on top of the cheesecloth in the bowl and pour 2 cups of distilled water over the lilacs. Make sure the lilacs are completely submerged in the water.
-
Step 3Cover the bowl with a plate and let sit overnight.
-
Step 4Gather the edges of the cheesecloth and bring them together, twisting the cheesecloth into a sachet with the lilacs in the middle. Secure the sachet with a piece of string.
-
Step 5Pour the lilac water into a pot and bring to a simmer. Place the sachet in the simmering water and allow it to cook for about an hour, or until it is reduced by half. Allow the perfume to cool completely.
-
Step 6Pour the perfume into a decorative bottle.
-
Step 7Add 4 drops of glycerin. Secure the lid and shake to combine.
Planting a Midnight Garden
 |
| Echinacea coconut lime |
 |
| Caraway |
Night Scents
Over the years, I have come to appreciate the more subtle floral colors, not for their daytime hues, but for how magical they become after sunset, even in simple starlight. A moonlit garden has a different set of fragrances—some subtle, some pronounced. In the heat of the day, many essences are lost to our senses because the heat evaporates them so quickly. At night, they are considerably more noticeable. Dianthus, which has a lovely, clove-scented fragrance by day, is absolutely delicious at night. |
| Allysums |
 |
| Shasta daisey |
Seeing By Night
I have light-colored gravel pathways in my garden—unremarkable by day; lighted walks by moonlight. In the background, I have a little fish-pond fountain, and the trickling water adds a peaceful backdrop to the allure of the garden.Plants such as the often-overlooked yucca even change shape after dark. In the daytime, the waxy, cream-colored blossoms hang down like bells. But at night, when the air has cooled, the flowers turn somewhat upward, releasing their scent to attract the moths that pollinate them.
Simpler elements of my garden, such as a light-gray limestone bench, look most inviting by the full moon. During the day, there are often so many interruptions, noises and responsibilities that I seldom get to sit and enjoy my garden. But at night, when the world is quiet and others’ demands on my time have ceased, I like to retreat to my nighttime garden. Many times I’ve sat on the bench with a midnight snack, enjoying the serenity.
 |
| Artemisia stelliria |
 |
| HollyHock |
 |
| Artemisia Schimidtiana |
Planting a Midnight Garden
|
| Echinacea coconut lime |
|
| Caraway |
Night Scents
Over the years, I have come to appreciate the more subtle floral colors, not for their daytime hues, but for how magical they become after sunset, even in simple starlight. A moonlit garden has a different set of fragrances—some subtle, some pronounced. In the heat of the day, many essences are lost to our senses because the heat evaporates them so quickly. At night, they are considerably more noticeable. Dianthus, which has a lovely, clove-scented fragrance by day, is absolutely delicious at night. |
| Allysums |
|
| Shasta daisey |
Seeing By Night
I have light-colored gravel pathways in my garden—unremarkable by day; lighted walks by moonlight. In the background, I have a little fish-pond fountain, and the trickling water adds a peaceful backdrop to the allure of the garden.Plants such as the often-overlooked yucca even change shape after dark. In the daytime, the waxy, cream-colored blossoms hang down like bells. But at night, when the air has cooled, the flowers turn somewhat upward, releasing their scent to attract the moths that pollinate them.
Simpler elements of my garden, such as a light-gray limestone bench, look most inviting by the full moon. During the day, there are often so many interruptions, noises and responsibilities that I seldom get to sit and enjoy my garden. But at night, when the world is quiet and others’ demands on my time have ceased, I like to retreat to my nighttime garden. Many times I’ve sat on the bench with a midnight snack, enjoying the serenity.
|
| Artemisia stelliria |
|
| HollyHock |
|
| Artemisia Schimidtiana |
pina-colada-cupcakes by Skinnytaste.com
 |
| http://www.skinnytaste.com/2011/04/pina-colada-cupcakes.html |
pina-colada-cupcakes by Skinnytaste.com
|
| http://www.skinnytaste.com/2011/04/pina-colada-cupcakes.html |
VERTICAL VEGETABLES: "Grow up"
VERTICAL VEGETABLES: "Grow up"
Found this on Instructables Site
VERTICAL VEGETABLES: "Grow up" in a small garden.

step 1Materials needed
- Hanging pocket shoe organiser /store. - Pole and attachments ( curtain pole or pipe fittings, screws). - Strong metal saucepan or utensil hanging hooks - Compost of a good quality moisture holding type. - Selection of plants or seeds... e.g. mixed leaf salad, herbs,sorrel, peas, mini tomatoes. - Piece of wood 2"x2" as long as the width of the pocket store to k…
- Hanging pocket shoe organiser /store. - Pole and attachments ( curtain pole or pipe fittings, screws). - Strong metal saucepan or utensil hanging hooks - Compost of a good quality moisture holding type. - Selection of plants or seeds... e.g. mixed leaf salad, herbs,sorrel, peas, mini tomatoes. - Piece of wood 2"x2" as long as the width of the pocket store to k…
 step 2Attach pole to shed or wall
I attached a strong chrome pole with metal fittings to the shed. You could use a curtain pole. Make sure it is at the correct height especially if you want to grow plants in a trough below ( see step 7). This uses the surplus water from the pockets above.
 step 3Attach hanging shoe store
Use strong hooks or wire to attach the shoe store. They must be strong enough to support the weight of the compost, plants and water.
 step 4Test drainage
Pour water into the pockets to check the drainage, if they don't drain then make a few small holes in each of the pockets.
 step 5Fill each pocket with compost
Add a good moisture retaining compost, fill to 1" below the rim so that water does not pour out over the rim.
 step 6Add plants or seeds
Sow seeds or add seedlings I suggest.... - herbs thyme, sorrel, chives - salad mixed leaf, mustard, cut and come again, or spinach - minibel tomatoes - 'petit pois peas you can eat the young leaflets and tendrils

step 8Maintaining a healthy hanging veg plot
- Water slowly with a gentle flow, or you may wash soil and plants out of the pocket and it will dirty the crop below. - Add water retaining crystals to the compost. HINT... add water to some crystals in a container and allow them to swell then add that to the compost and fill your containers, otherwise when the crystals swell they can grow so much that they push…
- Water slowly with a gentle flow, or you may wash soil and plants out of the pocket and it will dirty the crop below. - Add water retaining crystals to the compost. HINT... add water to some crystals in a container and allow them to swell then add that to the compost and fill your containers, otherwise when the crystals swell they can grow so much that they push…
step 9Develop the idea
- NEXT I would like ... -to hang up more shoe stores and pocket organisers, to increase the harvest. Could it become addictive??? will I end up covering every available wall? - try out different vegetables and herbs - add an automatic drip watering system.
- NEXT I would like ... -to hang up more shoe stores and pocket organisers, to increase the harvest. Could it become addictive??? will I end up covering every available wall? - try out different vegetables and herbs - add an automatic drip watering system.
VERTICAL VEGETABLES: "Grow up"
VERTICAL VEGETABLES: "Grow up"
Found this on Instructables Site
VERTICAL VEGETABLES: "Grow up" in a small garden.
step 1Materials needed
- Hanging pocket shoe organiser /store. - Pole and attachments ( curtain pole or pipe fittings, screws). - Strong metal saucepan or utensil hanging hooks - Compost of a good quality moisture holding type. - Selection of plants or seeds... e.g. mixed leaf salad, herbs,sorrel, peas, mini tomatoes. - Piece of wood 2"x2" as long as the width of the pocket store to k…
- Hanging pocket shoe organiser /store. - Pole and attachments ( curtain pole or pipe fittings, screws). - Strong metal saucepan or utensil hanging hooks - Compost of a good quality moisture holding type. - Selection of plants or seeds... e.g. mixed leaf salad, herbs,sorrel, peas, mini tomatoes. - Piece of wood 2"x2" as long as the width of the pocket store to k…
step 2Attach pole to shed or wallI attached a strong chrome pole with metal fittings to the shed. You could use a curtain pole. Make sure it is at the correct height especially if you want to grow plants in a trough below ( see step 7). This uses the surplus water from the pockets above.
step 3Attach hanging shoe storeUse strong hooks or wire to attach the shoe store. They must be strong enough to support the weight of the compost, plants and water.
step 4Test drainagePour water into the pockets to check the drainage, if they don't drain then make a few small holes in each of the pockets.
step 5Fill each pocket with compostAdd a good moisture retaining compost, fill to 1" below the rim so that water does not pour out over the rim.
step 6Add plants or seedsSow seeds or add seedlings I suggest.... - herbs thyme, sorrel, chives - salad mixed leaf, mustard, cut and come again, or spinach - minibel tomatoes - 'petit pois peas you can eat the young leaflets and tendrils
step 8Maintaining a healthy hanging veg plot
- Water slowly with a gentle flow, or you may wash soil and plants out of the pocket and it will dirty the crop below. - Add water retaining crystals to the compost. HINT... add water to some crystals in a container and allow them to swell then add that to the compost and fill your containers, otherwise when the crystals swell they can grow so much that they push…
- Water slowly with a gentle flow, or you may wash soil and plants out of the pocket and it will dirty the crop below. - Add water retaining crystals to the compost. HINT... add water to some crystals in a container and allow them to swell then add that to the compost and fill your containers, otherwise when the crystals swell they can grow so much that they push…
step 9Develop the idea
- NEXT I would like ... -to hang up more shoe stores and pocket organisers, to increase the harvest. Could it become addictive??? will I end up covering every available wall? - try out different vegetables and herbs - add an automatic drip watering system.
- NEXT I would like ... -to hang up more shoe stores and pocket organisers, to increase the harvest. Could it become addictive??? will I end up covering every available wall? - try out different vegetables and herbs - add an automatic drip watering system.
Mar 6, 2015
Great Lashes and more !

Love this very special Mascara , I highly recommend it !
https://www.youniqueproducts.com/touscela/party/1453054/view | |
Feb 23, 2015
Growing Plants In A Container
Found this on http://www.goodshomedesign.com/
Easy Tips for Growing Plants In A Container

One of the best ways to instantly improve your property’s is by installing plant material with colorful flowers or foliage.. Here’s an interesting technique for growing flowers and other plants in the garden, facilitating maintenance and pest control.
Be sure to drill a hole in your conteiner to allow for drainage.During the growing season keep the plants well watered and for maximum growth, use a liquid feed. So, depending on where you live, in the cold season can move these containers with flowers in a greenhouse.
You’ll need:
- drill
- pots
- bucket
- potting soil
- flowers
Growing Plants In A Container
Found this on http://www.goodshomedesign.com/
Easy Tips for Growing Plants In A Container
One of the best ways to instantly improve your property’s is by installing plant material with colorful flowers or foliage.. Here’s an interesting technique for growing flowers and other plants in the garden, facilitating maintenance and pest control.
Be sure to drill a hole in your conteiner to allow for drainage.During the growing season keep the plants well watered and for maximum growth, use a liquid feed. So, depending on where you live, in the cold season can move these containers with flowers in a greenhouse.
You’ll need:
- drill
- pots
- bucket
- potting soil
- flowers

Feb 12, 2015

Jan 17, 2015
Jan 16, 2015
23 Stunning Scrub Recipes
Found this on http://www.naturallivingideas.com/

We have put together a list of the best recipes out there to make sure every inch of you is looked after! We have a vanilla body scrub, a pumpkin foot scrub, a gardeners hand scrub, a strawberry lip scrub, a lemon coffee face scrub and so much more. There is something for everyone!
These DIY scrubs are so simple and cheap to make and would make super cute gifts for any woman in your life!
Body Scrubs
Warm Vanilla Brown Sugar & Coconut Body Scrub – A brilliant exfoliator and soothing scrub that will leave your skin feeling nourished.Peppermint Candy Sugar Scrub - A brilliant festive scrub for your whole body – this would make a great Christmas gift.
Homemade Whipped Shea Butter Body Scrub – A beautiful scrub that will sooth and relax your body.
Rosemary & Mint Salt Scrub – This refreshing salt scrub will help remove dead skin!
Foot Scrubs
Pumpkin Ginger Spice and Energizing Pumpkin Foot Scrub – A winter treat for your feet, this at home pedicure feeling will have you wanting more.Soothing Magnesium Foot Scrub – This simple and quick recipe is all natural and provides amazing relief for sore cracked feet.
Mint-Eucalyptus Foot Scrub – This foot scrubs doesn’t just nourish your tired feet, it can improve their circulation too!
Sugar Cookie Scrub – This intense scrub will sort the toughest feet out, with two different sugars it seriously exfoliates.
Peppermint Foot Scrub – This wonderful scrub will leave your feet feeling tingly!

Hand Scrubs
Gardeners Hand Scrub – This is a simple and brilliant way to help clean those dirty hands after a spot of gardening – it only requires 2 ingredients.Lemon Soufflé Hand Scrub – This lemony scrub will leave your hands feeling refreshed, smooth and clean whilst smelling fantastic.
Coconut Lime Raw Sugar Scrub – With only three ingredients this recipe couldn’t be simpler, this scrub is a real all rounder and could be used on your feet and body as well as hands.
Lemon Poppyseed Hand Scrub - This interesting recipe uses all the obvious ingredients, but instead of sugar or salt they use poppyseeds, a great alternative.
Olive Oil Hand Scrub – Olive Oil and Sugar are the only two ingredients here, a pure and simple way to get soft hands in one minute.
Lip Scrubs
Lime Margarita Mousse Lip Scrub – This delicious lip scrub will expertly soften sore lips and rejuvenate new skin.From Your Kitchen Lip Scrub – This lip scrub is easy to make and most ingredients you are likely to already have in your kitchen.
DIY Simple Lip Scrub – This simple recipe is a great alternative to expensive store bought versions and you won’t know the difference.
Strawberry Lip Scrub – This lush recipe sounds scrumptious, the berry seeds are great for the lips too!
Face Scrubs
Lemon Coffee Face Scrub – A real wake-up face scrub that will prepare you for early mornings and long days.Cleansing Face Scrub For Blemish Prone Skin – This face mask is gentle enough to sooth and reduce angry blemishes.
Homemade Fruit and Vegetable Face Masks - These scrubs each have a particular purpose like toning, brightening and protecting.
Skin Softening Honey & Oats Face Scrub - With natural antiseptic qualities and the simplicity of oats this is a pure and uncomplicated recipe.
Japanese Ground Rice & Bee Pollen Face Scrub - This recipe uses a small muslin bag in which the ingredients are mixed into, you then sooth over you face, making it less abrasive and harsh to your skin.
23 Stunning Scrub Recipes
Found this on http://www.naturallivingideas.com/
We have put together a list of the best recipes out there to make sure every inch of you is looked after! We have a vanilla body scrub, a pumpkin foot scrub, a gardeners hand scrub, a strawberry lip scrub, a lemon coffee face scrub and so much more. There is something for everyone!
These DIY scrubs are so simple and cheap to make and would make super cute gifts for any woman in your life!
Body Scrubs
Warm Vanilla Brown Sugar & Coconut Body Scrub – A brilliant exfoliator and soothing scrub that will leave your skin feeling nourished.Peppermint Candy Sugar Scrub - A brilliant festive scrub for your whole body – this would make a great Christmas gift.
Homemade Whipped Shea Butter Body Scrub – A beautiful scrub that will sooth and relax your body.
Rosemary & Mint Salt Scrub – This refreshing salt scrub will help remove dead skin!
Foot Scrubs
Pumpkin Ginger Spice and Energizing Pumpkin Foot Scrub – A winter treat for your feet, this at home pedicure feeling will have you wanting more.Soothing Magnesium Foot Scrub – This simple and quick recipe is all natural and provides amazing relief for sore cracked feet.
Mint-Eucalyptus Foot Scrub – This foot scrubs doesn’t just nourish your tired feet, it can improve their circulation too!
Sugar Cookie Scrub – This intense scrub will sort the toughest feet out, with two different sugars it seriously exfoliates.
Peppermint Foot Scrub – This wonderful scrub will leave your feet feeling tingly!
Hand Scrubs
Gardeners Hand Scrub – This is a simple and brilliant way to help clean those dirty hands after a spot of gardening – it only requires 2 ingredients.Lemon Soufflé Hand Scrub – This lemony scrub will leave your hands feeling refreshed, smooth and clean whilst smelling fantastic.
Coconut Lime Raw Sugar Scrub – With only three ingredients this recipe couldn’t be simpler, this scrub is a real all rounder and could be used on your feet and body as well as hands.
Lemon Poppyseed Hand Scrub - This interesting recipe uses all the obvious ingredients, but instead of sugar or salt they use poppyseeds, a great alternative.
Olive Oil Hand Scrub – Olive Oil and Sugar are the only two ingredients here, a pure and simple way to get soft hands in one minute.
Lip Scrubs
Lime Margarita Mousse Lip Scrub – This delicious lip scrub will expertly soften sore lips and rejuvenate new skin.From Your Kitchen Lip Scrub – This lip scrub is easy to make and most ingredients you are likely to already have in your kitchen.
DIY Simple Lip Scrub – This simple recipe is a great alternative to expensive store bought versions and you won’t know the difference.
Strawberry Lip Scrub – This lush recipe sounds scrumptious, the berry seeds are great for the lips too!
Face Scrubs
Lemon Coffee Face Scrub – A real wake-up face scrub that will prepare you for early mornings and long days.Cleansing Face Scrub For Blemish Prone Skin – This face mask is gentle enough to sooth and reduce angry blemishes.
Homemade Fruit and Vegetable Face Masks - These scrubs each have a particular purpose like toning, brightening and protecting.
Skin Softening Honey & Oats Face Scrub - With natural antiseptic qualities and the simplicity of oats this is a pure and uncomplicated recipe.
Japanese Ground Rice & Bee Pollen Face Scrub - This recipe uses a small muslin bag in which the ingredients are mixed into, you then sooth over you face, making it less abrasive and harsh to your skin.
Jan 13, 2015
Benifits of teas

Tea Properties:
Tea is rich in polyphenols, tannin, and flavanols (often termed catechins), fluoride, and vitamin C, P, K, and B. Although tea contains caffeine, the amounts are far less than those in coffee and produce a softer, beneficial effect. Studies suggest that as few as four servings of tea a day may have a positive impact on your health. Read on and continue sipping tea for your health and well-being.
Green Tea is an Antioxidant Powerhouse:
Researchers have found that green tea was the best antioxidant scavenger of deadly free radicals. Free radicals are very powerful oxidants, which cause intense cell damage. When exposed to Oxygen, cell tissues are vulnerable to free radical attachment, causing an effect much like that of rust. Over time, this may lead to cancer or cardiovascular disease. The Antioxidants in tea are able to neutralize the damaging effects of oxygen and free radicals that are present in the body. Antioxidants slow or prevent cell damage from exposure to oxygen by creating a barrier around cell tissue.
(University of California, Berkeley)
Green Tea & Cancer Prevention:
Green Tea has been found to inhibit the growth of esophogeal and stomach tumors in mice. Green and black Tea could inhibit the development of pre-cancerous lesions as well.
(Saitama Cancer Center and the Department of Biochemistry, Bunri Tokushima University)
A recent study showed that a compound in black tea called "TF-2" caused colorectal cancer cells to "commit suicide"; normal cells were unaffected.
(Rutgers University)
White Tea Health:
Recent studies show that the polyphenols found in green tea appear in greater concentrations in white tea, helping to destroy bacteria and other organisms that cause disease.
(Pace University's Dyson College of Arts & Sciences)
Black Tea Improved Cardiovascular Health and Reduced Risk of Stroke:
A study undertaken found that, of 340 men and women who had suffered from heart attacks, those who drank a cup or more of black tea daily had a 44% lower risk of repeated heart attacks compared to non-tea drinkers. Flavonoids are theorized to improve the lining of blood vessels, accounting for the decrease.
(Brigham and Young, Harvard Medical School)
Studies show that drinking black tea helps to prevent narrowed or clogged arteries that lead to ischemic heart disease, heart attack, or stroke.
(Boston University School of Medicine; The Zutphen Study, Netherlands)
Reduces "Bad" Cholesterol:
Black tea was shown to reduce LDL-cholesterol ("bad cholesterol") by 11.1% in three weeks. It was speculated that tea polyphenols might limit the absorption of cholesterol in the intestine, thus reducing the cholesterol levels in the blood.
(U.S. Department of Agriculture)
In addition to reducing the "bad" cholesterol LDL deposits, tea elevates HDL, the "good" cholesterol. Green tea and oolong especially, could prevent arteriosclerosis.
(The University of California)
Tea Prevents Tooth Decay:
Studies show the tannin and fluoride content present in tea prevents tooth decay.
(American Dental Institutions)
Green Tea & Oral Health:
The Flavonoids, mainly catechins, found in green tea have exhibited inhibitory effects on the growth of cariogenic bacteria by inhibiting the adherence and growth of plaque at the tooth surface.
(Sakanaka, et al (1990)
Black Tea & Green Tea Prevents Bad Breath:
Polyphenols found in both green and black tea can block bacteria from producing foul-smelling compounds such as hydrogen sulfide in the mouth.
(American Society for Microbiology, Washington, DC)
Green Tea Relieves Arthritis::
Green tea was shown to inhibit the development of arthritis in mice. Mice given green tea polyphenols were significantly less likely to develop arthritis. The study was conducted on 36 mice. Of the 18 mice that received the green tea, only eight (44%) developed arthritis. Among the 18 mice that did not receive the green tea, all but one, or 94% developed arthritis.
(Proceedings of the National Academy of Sciences, CWRU's School of Medicine)
Green Tea Increased Metabolic Rate:
It was found that green tea extract resulted in a significant increase in energy expenditure (a measure of metabolism), plus, it also had a significant effect on fat oxidation.
(American Journal of Clinical Nutrition)
Green Tea Burns Calories:
A recent study showed that green tea's antioxidant "EGCG" stimulates the body to burn calories, notably fat. In the study, a daily dose of 270 mg of EGCG (the amount in 2 to 3 cups of green tea) caused men to burn 4% more energy - about 80 extra calories a day.
(University of Geneva, Switzerland)
Reduced Risk of Kidney Stones:
In a study of more than 81,000 women 40 to 65 years of age, it was concluded that 8 fluid ounces of tea consumed daily actually lowers the risk of developing kidney stones by 8%.
(The Third International Scientific Symposium on Tea & Human Health)
Furthermore, tea acts as a diuretic (stimulates the flow of urine), promoting better kidney function and aids digestion.
Retards the Aging Process:
It has been shown that Green Tea reduces infection and the stresses of bacteria on the system thus significantly retarding the aging process.
(The Department of Food and Nutritional Sciences, University of Shizuoka, Japan)
Immune Booster:
Blood cells from tea drinkers respond 5 times faster to germs than those of coffee drinkers.
(Brigham and Women's Hospital, Boston, MA; Harvard Medical School, Boston, MA)
Pu-Erh Reduces Cholesterol and Aids in Digestion:
Pu-Erh has long been drunk for its health properties - namely known to eliminate cholesterol - and sipped after meals as a digestif.
Holds Promise as HIV Therapy:
Epigallocatechin gallate (EGCG), an active ingredient in tea, has antiviral, antioxidant and antibacterial properties that are now being reported to inhibit the HIV virus.
(Baylor College of Medicine, Houston, TX)
The FDA has not approved or verified these statements. They are not meant to diagnose or treat any illness or medical condition. If you have any questions regarding Tea & Health, we suggest you ask your Doctor.
Benifits of teas
Tea Properties:
Tea is rich in polyphenols, tannin, and flavanols (often termed catechins), fluoride, and vitamin C, P, K, and B. Although tea contains caffeine, the amounts are far less than those in coffee and produce a softer, beneficial effect. Studies suggest that as few as four servings of tea a day may have a positive impact on your health. Read on and continue sipping tea for your health and well-being.
Fruit Cordials
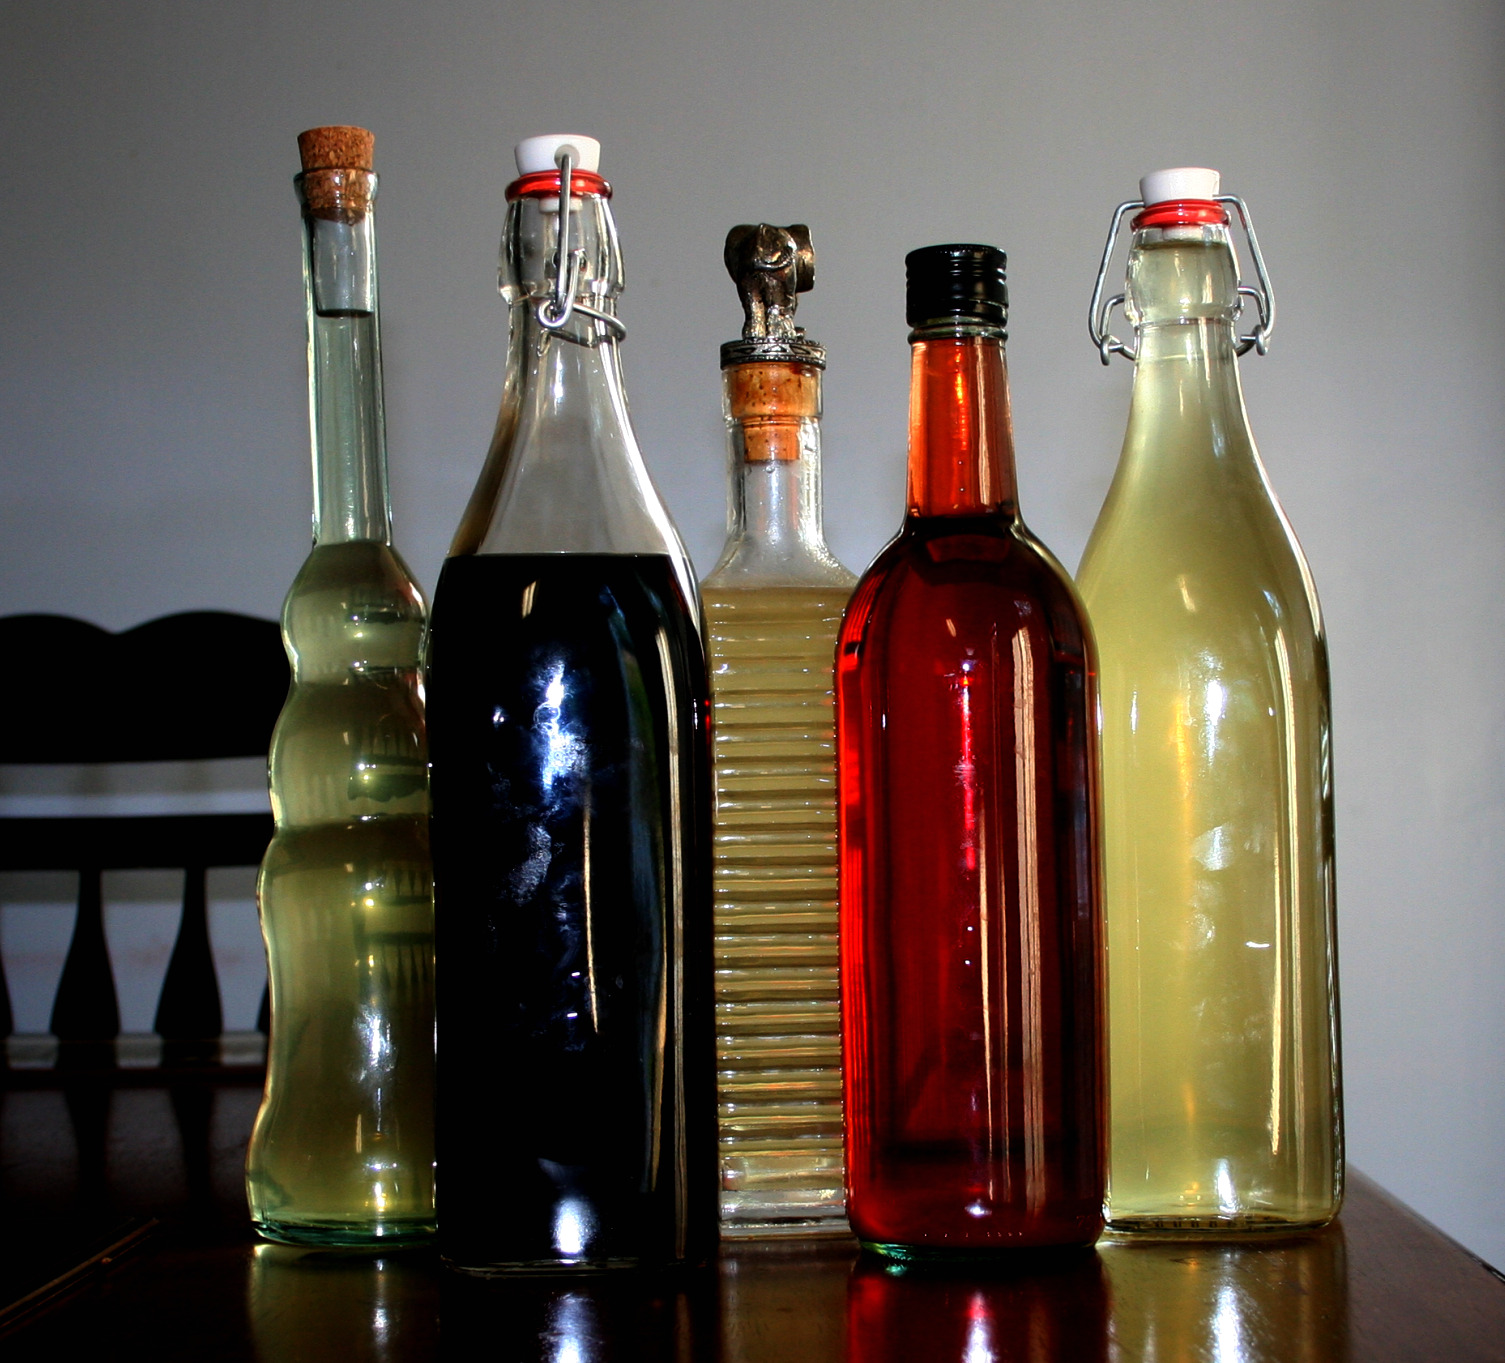
I found these wonderful recipes in the Herb Mentor website.
Check them out You will find many good tips about Herbs over there!
There are three main steps to making cordials.
Steeping - in this step, the ingredients are steeped in the alcohol (usually vodka or brandy, but you can try anything you like).
Sweetening - typically a sugar syrup is used, but maple syrup is a great substitute. Honey can also be used.
Aging - The flavors all improve tremendously with age. Generally 2 to 4 weeks is good. I like to leave mine longer, if possible.
Here are some recipes to get you going:
Wild Blackberry Cordial- Christy Sarles (radicalweeds.com) There are three main steps to making cordials.
Steeping - in this step, the ingredients are steeped in the alcohol (usually vodka or brandy, but you can try anything you like).
Sweetening - typically a sugar syrup is used, but maple syrup is a great substitute. Honey can also be used.
Aging - The flavors all improve tremendously with age. Generally 2 to 4 weeks is good. I like to leave mine longer, if possible.
Here are some recipes to get you going:
Pick enough berries to fill a clean glass jar in the size of your choice at least a third, and up to a half, full. I use about two quarts of berries for a gallon of cordial. If those lovely wild blackberries don't grow in your neighborhood, you can substitute raspberries or blueberries. The little wild blueberries will give your cordial a more intense flavor than the larger cultivated ones, but either way blueberries are relatively tough-skinned and you will need to macerate them - crush or grind coarsely - before adding the other ingredients.
Fill the jar to the top with equal parts of maple syrup and brandy. I usually use E&J brandy, but any decent variety of 80 proof brandy will do fine. As for the maple syrup, I like the dark, late-season Grade B syrup because it has the strongest maple taste and contains more minerals than the three lighter Grade A syrups produced earlier in the sugaring season. You can use whatever grade of maple syrup you prefer, but please make it real. Don't use the artificial stuff!!
Put the cover on the jar and shake to mix. Label, date, and leave the fruit to infuse for at least 10 days, and up to 6 weeks. Shake occasionally when you think of it. Strain out the fruit (marvelous over ice cream) and decant the cordial into glass jars or bottles. Keeps for years without refrigeration - but I guarantee it won't last that long!
Peach Cordial, Christy Sarles
Cut unpeeled peaches in quarters, and add them to a wide-mouth glass jar. Pits optional. Fill the the jar with brandy, to cover the fruit. (I use E&J brandy, which has no preservatives,although as a child of the 60s it still galls me to buy Gallo...). Anyway, let it sit, shaking it up occasionally, until the peaches lose their color and start looking mushy. Then, depending on where you are in the season, you can either proceed to the sweetening stage or strain and pour the brandy over a new batch of fresh peaches (and pits) for a more intense peach flavor.
When you're ready to sweeten and bottle, strain out the fruit and add the ginger syrup -- a quart per gallon, or more to taste. Start with a basic simple syrup recipe -- 2 parts water to 1 part sugar (demerara is my preference). Add sliced, unpeeled ginger to taste. I like it HOT, so I use LOTS of fresh ginger -- at the very least a cup.
Simmer/boil for 15 minutes or so til it thickens up, let it cool with the ginger in it, then strain and add to the peach brandy. Decant to smaller bottles as needed.
Pear Cordial, Christy Sarles
Use the basic fruit/brandy/maple syrup cordial recipe with either peaches or pears (or any other fruit), using 1/2 fruit and the rest equal portions of brandy and maple syrup -- or more or less of either one depending on how sweet you like it. I always look out at yard sales for pretty little bottles to fill up with summer cordials for winter solstice gifts -- a little bit of midsummer in midwinter!
Kahlua Recipe, Susanna Reppert (therosemaryhouse.com)
- 2 C water
- 2 C sugar
- 1/2 C dry instant coffee (a dark roast is best)
- 1 fresh vanilla bean, chopped
- 1-1/2 C vodka
Allow to cool and combine this sugar/coffee/vanilla syrup with the vodka. It tastes yummy right away but improves and mellows as it ages. If you want a cleaner product strain out the vanilla particles. If you want an even smoother taste add 1 t glycerin to the finished blend. Yield: about 4 cups.
Tip: Drizzle over ice cream. Oh my goodness....
Tea Liqueur, Susanna Reppert
- 1 T good quality tea leaves, we like earl grey or darjeeling
- 1 ½ C vodka
- ½ C sugar syrup
- Steep the leaves in the vodka for 24 hours only.
- Strain, filter, and add sugar syrup. Ready in 24 hours!
- 10 oz package of berries, strawberry, raspberry or any berry (fresh or frozen)
- 1 ½ C Vodka
- ¼ C sugar syrup
- Steep berries and the juice in the vodka for one week.
- Strain and filter.
- Taste and add sugar syrup as needed.
And some of my own personal favorites:
Elderberry Cordial
- 1pint fresh elderberries OR 1 cup dried berries
- 1 pint 80 proof brandy
- 1 pint Maple syrup
- 3-5 cinnamon sticks
- a few slices of fresh ginger
- 2 cardamom pods
- the zest of one lemon
Chocolate Cherry Cordial
- 2 pints pitted sour cherries
- 1/2 cup cacao nibs
- 1 vanilla bean
- 1 qt brandy
- 1 qt maple syrup
Nectar of Venus Cordial
This beverage needs to be made up early in January for use mid- February, but it will be worthwhile. The flowers give it a beautiful deep pink color, and can be served with ginger ale and lime slices.
The following ingredients should be placed in a ½ gallon jar with a tight fitting lid that allows for shaking. Be sure to label and date the jar. Put out of sunlight while it sits for 1-6 weeks. Shake occasionally. All herbs and flowers are dry.
- 1 fifth of good quality vodka ½ c red rose petals
- ½ c hibiscus flowers ½ c rose hips
- ½ c spearmint ¼ c granulated orange peel
- ¼ c cinnamon bark chips
- 1 c Grand Marnier
- 4 c simple syrup made from 2 c water, 2 c sugar.
- 1 T either rose water or orange blossom water.
Add these ingredients to the vodka mixture and blend well. Allow this to rest for a couple of weeks so that the flavors can become well acquainted. Pour into beautiful bottles, cork, label, and enjoy.
Lavender Limoncello
- Zest from 10 lemons
- 1 fifth vodka
- 1 cup lavender buds
- 3 cups sugar
- 4 cups water
- First infuse the lavender in the vodka for 24 hours. Strain. If you leave the lavender longer, it gets too medicinal for my tastes.
- Next, infuse the lemon zest in the vodka for one week, and strain.
- Make a simple syrup with the sugar and water, boiling gently for 15 minutes without stirring. Cool well, and add the infused vodka. Allow this mixture to steep together for at least 2 weeks. Serve ice cold.
- Substitute rose geranium leaves for lavender buds for a real treat!

Fruit Cordials
I found these wonderful recipes in the Herb Mentor website.
Check them out You will find many good tips about Herbs over there!
There are three main steps to making cordials.
Steeping - in this step, the ingredients are steeped in the alcohol (usually vodka or brandy, but you can try anything you like).
Sweetening - typically a sugar syrup is used, but maple syrup is a great substitute. Honey can also be used.
Aging - The flavors all improve tremendously with age. Generally 2 to 4 weeks is good. I like to leave mine longer, if possible.
Here are some recipes to get you going:
Subscribe to:
Posts (Atom)